


Life
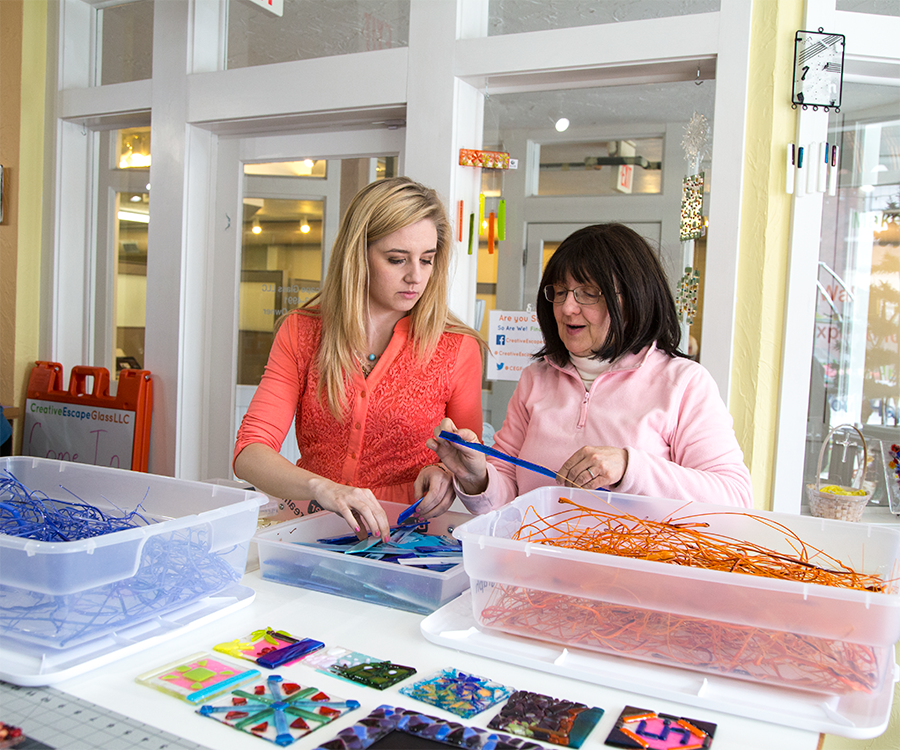
Creative Escape Glass
Next time you’re looking for something fun to do on a Saturday afternoon, pop in to Creative Escape Glass and learn the art of glass fusion. You’ll be surprised how easy it is and may discover a new hobby in the process.
Written by Jennifer Adamson | Photos by Vivian Wheeler
May 2016
Rebekah Santiago was putting the finishing touches on decorating her home in New Mexico when she realized something was missing: a cross to hang above the front door. She searched for one that was colorful and just the right size, but she couldn’t find what she wanted.
Meanwhile, a fused-glass studio an hour away in Durango, Colorado, had recently opened for business. Santiago and her husband, Rafael, made a day trip to the shop and were drawn to the satisfaction of transforming broken pieces into works of art. There, Santiago made an original mosaic cross and started a hobby she now shares with 417-land as owner of Creative Escape Glass LLC. “I enjoy having people come in who haven’t really created before and seeing the look on their faces when they get their pieces back,” she says. “You don’t have to be creative in order to create something beautiful.”
Creative Escape Glass offers open studio time four to five days a week, as well as Saturday events, to people interested in learning the craft of glass fusion, which involves melting pieces of glass together into a cohesive object. No experience is necessary because Santiago is always on hand to guide new fusers. Plus, templates and instructions are available, making the process easier than you might think. “It’s very relaxing and such a stress relief,” Santiago says.
Projects range from $3 to $250 depending on size and special materials. There’s also a small in-house gallery where you can view sample projects or purchase items if you don’t want to make your own. Before you pay a visit to the studio to try glass fusing for yourself, read about the basic steps you’ll need to learn in order to become a master at the craft.

You can pick out any color combination of glass to make your project fit any style.
Step 1: Pick your project based on size and shape. Creative Escape Glass has finished examples, templates and instructions for all skill levels, but the 6-inch flower plate is ideal for beginners.
Step 2: Choose your glass. Color combinations are up to you.
Step 3: Refer to the instructions for how many cuts you need to make. Place a scorer at one edge of the glass. Slowly and with slight pressure, push the scorer straight out and away from your body and off the other edge. If your design has embellishments, like flower petals, lay the glass on top of the template provided and trace the pattern with a marker first. Then cut along those lines, but ignore any curves. You round the edges later.
Step 4: Squeeze gently with a pair of glass pliers to break the glass along the lines you scored. Safety goggles are a must from this point forward.
Step 5: Take any decorative pieces with rough edges to the diamond grinder. Fill the reserve tank with water and wet the bit, then turn on the machine. Using your fingers, push each piece of glass firmly against the rotating bit, running the glass back and forth to form a curve.
Step 6: Clean all your pieces to get rid of lingering oils from your fingers.
Step 7: Assemble your design smooth side up to reduce the likelihood of air bubbles, then put your masterpiece in a kiln to fire for 24 to 48 hours.

Owner Rebekah Santiago shows off The Weave Bowl, $75.