
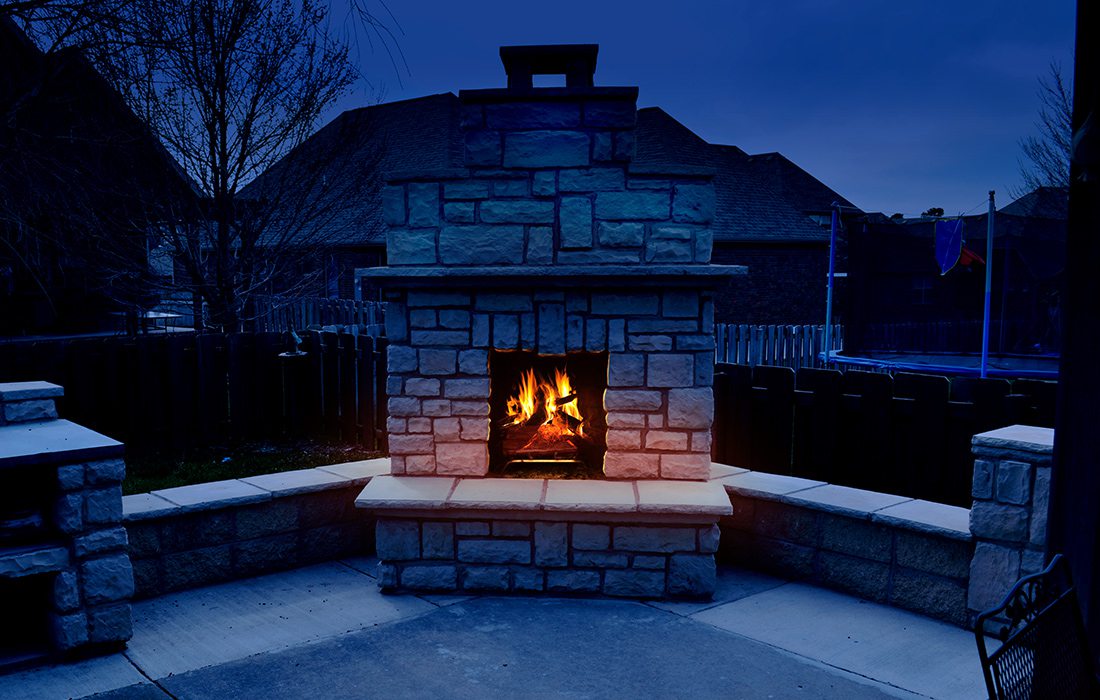
Photo courtesy Janelle HaikJames Haik built a masonry fireplace on his family’s back patio in summer 2017 after watching videos on YouTube.


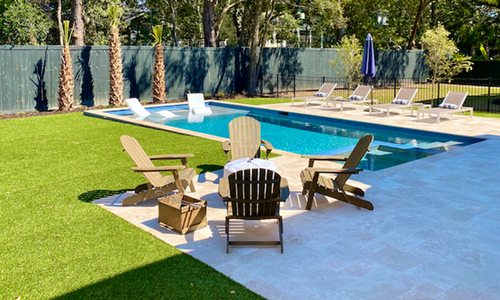
A crackling fire is a magnet in any season, and a stacked-stone or masonry fireplace adds luxury and warmth to your outdoor seating area for all those summer nights outdoors.
May 2018
Who doesn’t dream of having an outdoor kitchen or living room, especially one that has a stunning fireplace as a focal point? An outdoor fireplace is an increasingly sought-after home feature that allows you to extend your living space and spend more time outside by providing warmth and light during fall and winter months and a great place to gather during summer nights spent under the stars. (Not to mention providing an insta-worthy backdrop in every season.) An outdoor fireplace is also a good investment. The National Association of Home Builders estimates that an outdoor fireplace can increase a home’s value by an average of $3,500, and they are practically considered “must-haves” in luxury homes.
You can add a touch of luxury to your own patio and save a ton of money if you are willing to take a DIY approach. Building your own outdoor fireplace takes a bit of expertise, good instructions and a fair amount of hard work. Pre-fabricated kits that make the job easier are widely available, or you can go old-school and build a classic masonry fireplace, which allows you to tailor the design and size to your specific preferences.
Janelle and James Haik added an outdoor kitchen to their home in Nixa in summer 2017. “I think an outdoor fireplace is kind of a fantasy for many people, a place where you can have a glass of wine or a beer, visit with friends and family,” James says. “Janelle wanted one for awhile, and what actually prompted us to do it was a landscaping problem. We had a row of hedges that surrounded our patio, and two bushes died; it was a very mature hedge, and there was not going to be any replacing of what was there. Janelle went to Kansas City to visit her parents one weekend, and I grabbed the Stihl chainsaw and whacked everything down to nothing. When she came home, there was just an F-150 full of shrubs; that’s how the project started.”
After watching about 200 hours of YouTube videos, James decided to build a masonry fireplace from scratch. “I’m not a mason; I’d never laid a block in my life,” he says. But he chose this approach for its solid construction and permanence. “I’d watch a video on how to pour concrete the proper way so it wouldn’t crack, learn how to set the rebar, and then I’d go outside and do it,” James says. “Then I’d watch videos on how to construct the base, then I’d go outside and do it. Same thing when I got to the chimney, I’d watch videos to learn how to set flue tiles and know which mortar was best. It was just a process of completing one step at a time and not getting it wrong.
“It was about a four-and-a-half-month process. I did everything myself, working evenings and weekends (and forgoing trips to the lake). The first step obviously was pouring the cement slab. I bought my own cement mixer and poured 300 bags of cement myself because the houses in our neighborhood are so close together, a cement truck couldn’t get back there.
“It’s not for everyone,” James cautions. “I calculated a rough estimate, and I carried a little over 200,000 pounds into my backyard. The cement, the rock, the veneer—it’s all heavy. Anyone considering a project like this needs to be in good physical condition. It’s not easy. You’re handling each product more than one time. The cinder block goes on the trailer, off the trailer, then you have to pick it up again to set it. If you’re healthy and don’t mind learning, the DIY approach might be a good choice.”
Now that the work is done, the Haiks are looking forward to enjoying their new fireplace with friends and family. “It’s going to be a long time before we’re ready to move from this house,” James says with a laugh.
Where to Buy:
Midwest Block and Brick
midwestblock.com
Acme Brick, Tile and Stone
acmebricktileandstone.com
Instructions:
1. Choose a kit that meets your design and size preferences.
2. Pour a concrete pad.
3. Stack the pieces of pre-engineered masonry in your outdoor fireplace kit.
4. Install the firebrick.
5. Affix the stone veneer of your choice.
Materials:
Protective Gloves
Tape Measure
Pencil
Notepad
Shovel
Concrete Foundation
2-by-4 Pressure-treated Lumber
Screws
Screwdriver
Nail Gun
Nails
Drill
Chop Saw
Cement Backerboard
Masonry Anchors or Bits
Mortar
Stacked Stone
Trowel
Chimney Cap
Concrete Cinder Blocks
Instructions:
1. Using your tape measure, determine the size of your space and draw a detailed design on a notepad.
2. Map out your space and then create a concrete foundation.
3. Lay your concrete.
4. Build a facade frame to build upon using the pressure-treated lumber, securing it in place with screws and using the chop saw to cut boards to size.
5. Attach cement backerboard with masonry anchors and screws.
6. Add mortar to your base and install stacked stone, building in layers.
7. Finally, attach chimney cap.